Showing posts with label MATLAB. Show all posts

Sunday, June 26, 2011

MTK NMEA checksum calculation

The MTK NMEA checksum can be calculated by using the following procedure:

The NMEA Checksum is calculated on a character by character basis using an XOR operator. Each character is fed into an XOR with the current checksum value. The checksum is initialized to all zeros. The characters that exist between the "$" and "*" are the only characters to be used in the calculation. These values are in ASCII, thus each character is represented as an 8-bit value. The resulting checksum is an 8-bit HEX value which is represented as 2 ASCII characters. Below is an example of this procedure:

$PMTK000*32


0000 0000 <==Checksum
0101 0000 <==P

0101 0000 <==Checksum
0100 1101 <==M

0001 1101 <==Checksum
0101 0100 <==T

0100 1001 <==Checksum
0100 1011 <==K

0000 0010 <==Checksum
0011 0000 <==0

0011 0010 <==Checksum
0011 0000 <==0

0000 0010 <==Checksum
0011 0000 <==0

0011 0010 <==Checksum

This results in a checksum of 32 which matches what was shown above.

And for those folks that use MATLAB, HERE is a very basic program that I wrote up that does this for you.

Enjoy!

Wednesday, October 14, 2009

Image Processing: Dithering Presentation


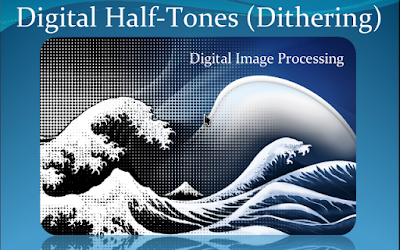
Here is another presentation I made a couple years ago for my class in Digital Image Processing. I presented on a very interesting concept called dithering. In this presentation, I discussed several methods of dithering (one of the more interesting methods being "error diffusion"). Check it out.

Dithering Presentation

Hopefully in the near future I will actually post my code for this project, so that people with interest in the topic can play around with the code. My matlab code had support for all the popular, well known, dithering algorithm out there, as well as some more interesting concepts such as image fusion via dithering.

Thursday, October 8, 2009

Matlab FFT Frequency Axis Reconstruction

Time and time again, I find myself needing to remember how to accurately reconstruct the frequency axis of an FFT in Matlab. This is one of the ways that I have documented as being a pretty close approximation of the frequency axis. This code will also properly compute the magnitude of each frequency component.

The code below uses the signal below as an example:
y=5*sin(10*2*pi*x)+3*sin(22*2*pi*x)+cos(13*2*pi*x)+7;

Now the Code:


Now the result:


Hope you find this useful.

Thursday, October 1, 2009

Matlab TightAxis Function

During one of my graduate classes I decided to create a function that makes a window that turns off all the Matlab figure toolbars and makes the axis fill the window AND scales the window to fit the image's native resolution so that no pixilization or aliasing occurs. If the image does not fit in the monitor's native resolution then the function will keep the current window size. When calling the TightAxis function make sure the current axis is the axis you want to modify as I use:
gca

If the axis you are currently interacting with is the one you want to modify just issue the command:
TightAxis(FIGURENAME)

Where FIGURENAME is a string that will be used to label the figure window.
Here is the function:

function TightAxis(title)
%First create an axis if
%the user doesn't have a gca
%and get the handle
haxis=gca;
%Best Image Fit Algorithm
set(gcf,'Visible','off')
set(haxis,'Position',[0,0,1,1])
monitorRes=get(0,'ScreenSize');
imageSize=get(haxis,'PlotBoxAspectRatio');
pos=get(gcf,'Position');
%Check for over sized images
%IF the native resolution of
%the image fits in the screen resolution
%AND the image does not contain a
%1-pixel dimension
%THEN scale the image to be displayed
%at 1x Resolution
if (imageSize(1)<=monitorRes(3)
&& imageSize(1)>1
&& imageSize(2)<=monitorRes(4)
&& imageSize(1)>1)
set(gcf,'Position',[0,0,imageSize(1:2)])
else
set(gcf,'Position',[0,0,pos(3:4)])
end
set(gcf,'Name',title,'NumberTitle','off')
set(gcf,'MenuBar','none')
zoom on;
movegui(gcf,'center')
set(gcf,'Visible','on')

Monday, September 28, 2009

Matlab's Find Function

Throughout my entire undergraduate studies at UNH there was a great deal of interaction with MATLAB; however, I was never exposed to one of the nicest functions in MATLAB until grad school. The function I am referring to is:

find


Find, is a very powerful function that can be used to help you search for certain elements in an array. Lets start off with a practical application of "find". Suppose you have a voltage signal that is stored in two arrays. The first array contains all the sampled voltages (lets call this array vArray) and the second array contains the timing information (lets call this array tArray). Suppose we want to determine where all the zero-crossings are in the signal and then pull the corresponding timing information from it. Just follow this code:


And Here is a plot of the Results


As you can see, I detected every zero crossing point in the signal. Now if this was a real system, I probably wouldn't want to detect the zero crossings with the noise that I have; in which case I would want to apply a low-pass filter of some sort that restricts the detection to the intended signal, but that is out of the scope of this topic.

Now it's your turn to play around with "find".

Matlab Performance Benchmarking

Matlab has a lot of interesting little functions/programs that you will come to discover along the way. One of the interesting functions that matlab has is an evaluation timer. By using the "tic" and "toc" commands, you can get an idea of where your inefficiencies are in your coding. I learned about this feature during a course I took in my graduate studies called Introduction to Neural Networks. Neural Networks are a very process intensive and it is important to be as efficient as possible if you want to have some sort of practical application. In neural networks it is common to see algorithms displayed in two forms: iterative/looping or vector-matrix form. I was playing around with these two forms and was interested in how one method performed over the other so I started search for a way to benchmark my functions; thats when I came across tic-toc. I already knew Matlab was particularly friendly with matrix operations versus looping operations but I wanted to quantify that speculation.

tic
CODE HERE
toc

By encapsulating your code between tic and toc Matlab can output a timer that keeps track of how long it took to evaluate that segment of code. Try it out for yourself and you might find some better methodologies for coding in Matlab.

Also, if you are just looking to benchmark your computers performance try:

bench

Thursday, July 16, 2009

Topic #2 (Part2): Matlab GUI Callbacks

Last time we discussed the very basics of Matlab GUI. We learned what "handles" are and some of the primary functions that one would use to interact and gain additional functionality from a handle. In this section, I would like to discuss callback functions. Callback functions are a very important element to GUI programming. One of the key mindsets to GUI programming is to understand that they are "event-based" programs. Event based programs are programs that if left untouched do absolutely nothing, the only time when they execute functions is when the user interacts with it.

As we discussed last time there are some very fundamental functions that we must understand to use a graphical object. One of the is the "get" function. Say we create a window that contains a pushbutton by using the following code:

h=figure(1);
pb=uicontrol('Style', 'pushbutton');

Not much going on in the above statements. If we want to give the pushbutton some task to do, we would want to specify the callback function. To see all the attributes that can be set on the pushbutton, issue the command:

get(pb)

Which will return something like this:

BackgroundColor = [0.941176 0.941176 0.941176]
Callback =
CData = []
Enable = on
Extent = [0 0 4 4]
FontAngle = normal
FontName = MS Sans Serif
FontSize = [8]
FontUnits = points
FontWeight = normal
ForegroundColor = [0 0 0]
HorizontalAlignment = center
KeyPressFcn =
ListboxTop = [1]
Max = [1]
Min = [0]
Position = [20 20 60 20]
String =
Style = pushbutton
SliderStep = [0.01 0.1]
TooltipString =
Units = pixels
Value = [0]

BeingDeleted = off
ButtonDownFcn =
Children = []
Clipping = on
CreateFcn =
DeleteFcn =
BusyAction = queue
HandleVisibility = on
HitTest = on
Interruptible = on
Parent = [1]
Selected = off
SelectionHighlight = on
Tag =
Type = uicontrol
UIContextMenu = []
UserData = []
Visible = on

As you can see, "Callback" is not set to anything by default. Lets say we want it to compute x=sqrt(2) whenever we push the button. There are two ways we can set the callback.

Generally, the best way to handle a callback function is to make a function that does what you want the callback to do. In this case we would make and save a function like:

function rootTwo
sqrt(2)

And we would set the callback using:

set(pb,'Callback',rootTwo);

To make things even more trackable in your code you could make a single function that contains all the callback functions. For example, if you make a callback function called callbackFcn you could do this:

function callbackFcn(ID)
switch ID
case 1
disp('ID=1, pb1 pressed...')
sqrt(2)
otherwise
disp('Incorrect Callback ID...')
disp('Doing nothing.')
end

And you would set the Callback with the specific ID you want the function to be passed:

set(pb,'Callback',callbackFcn(1));

However, since this is such a simple task, instead of making another file that can make it difficult to navigate through your code, you may want to just emmbed that function into the callback string. This can be done using:

set(pb,'Callback','sqrt(2)');

Note: that if the function you are trying to use contains a string and you want to embed the function inout the callback string, then you need to use a second quotation for every single quote in the statement. For example, if I want to use the statement below in my callback:

x=['abc,'def'];

The I would have to use the "set" function like this:

set(pb,'Callback','x=[''abc,''def''];');

These second quotation marks act as a sort of "escape character" that prevents the callback function from being misinterpreted.

I think this is all I will discuss about callback functions for now. But be sure to use the "Product Help" in Matlab (search for uicontrol properties) to get more information.

But before I conclude this post I want to discuss two properties that are sort of overlooked by the average user. When you get more advanced in GUI design using Matlab, it isn't uncommon to have 100 handles that you need to interact with. Managing these handles can be a nightmare if you done understand some of the options that Matlab has set forth for such occassions. Two of the most useful properties that can be used are "Tag" and "UserData". The "Tag" is generally understood to be a unique name to that uicontrol. Say for instance you have three pushbuttons, it might be logical to give them Tag names: "pb1", "pb2", and "pb3". What this does is it gives the user a means to find a handle that a function does not have stored locally in its memory space. This is where the power of the function "findobj" comes in. Findobj takes in a couple arguments, the first is a property name and the second is the corresponding property value to look for. If I want to find the handle of the pushbutton with the Tag='pb2', I would issue the command:

findobj('Tag','pb2')

The second and more interesting property is the 'UserData' property. Matlab documentation says that this has no inherent function or purpose, so what we can do is exploit this and use it as a sort of heirarchy for graphical objects. Say you have several objects that you would like to operate on in the same exact manner. Instead of individually referencing their unique Tag names you can make a group name using UserData. If I want pb1, pb2, and pb3 to all get set to invisible it might be nice to group them first so that in the future the number of statements I have to code are reduced. Here is a full example of how one could use UserData:

uicontrol('Style','pushbutton',...
'Tag','pb1',...
'UserData','pbGroup');
uicontrol('Style','pushbutton',...
'Tag','pb2',...
'UserData','pbGroup');
uicontrol('Style','pushbutton',...
'Tag','pb3',...
'UserData','pbGroup');
handles=findobj('UserData','pbGroup');
for i=1:length(handles)
set(handles(i),'Visible','off');
end

This is a very primative example but it should get the point across that you can keep using Tags to individually reference a handle and you can use UserData to reference a collection of handles. You can even get fancy with the UserData and have a function that reads the UserData and checks to see if an object belongs to more than one grouping and operate on that object accordingly.

I think this is enough for now. Eventually, I will post a videoclip that will showcase some GUIs that I made that use the features I have outlined above.

Friday, July 3, 2009

Topic #2 (Part1): Matlab GUI


Taking a little detour from HDL, I would like to discuss the second topic, which concerns the engineering programming/scripting language called Matlab. Practically all electrical/computer engineers have encountered Matlab at some point of their studies. For those less familiar with it, Matlab is a Matrix laboratory that serves as an excellent tool for visualization of engineering problems. Having a strong background can be a huge benefit when it comes to applying for a job concerning research/developement in an electrical/computer engineering field. In this topic, I would like to discuss the methods of creating a GUI without the aid of Matlab's GUI creator GUIDE.

The most fundamental component to creating a GUI in Matlab is the "handle". It is critcal to GUI creation that you fully understand what a handle is, so I will take this very slow. As the name suggests, a handle is a component of an object that you "can grab onto", basically meaning it serves as a unique identifier in the environment that you can call, set, and get different properties. Each time a handle is created Matlab generates a new value that is not in use. In the simplest case you might create a figure by issuing the command:

figure(1);

By dowing this, Matlab creates a handle value of 1 that is used to control the newly created figure window. If two other windows are created after this, where the handle value is not set, matlab will auto-increment to the next unused value. Thus, issueing the command figure twice after figure(1) would yeild two new figure windows one which has a value of 2 and the other a value of 3. If however, before calling that third figure window I were to close/delete the first figure (which has a handle value of 1), that third figure command would recreate the handle value of 1 instead of continuing with the incrementing scheme. Note: these integer handle values are generally reserved for figure windows, other object will generally use floating point but you can manually assign a handle of either integer or double depending on your needs/preference. Whenever an object is being created, such as a figure, an axes, a uicontrol, etc the programmer can choose to store the handle value into a variable to easily reference that object at a later time. For instance:

a=figure;
b=axes;

The commands above would create a figure of some handle value that gets stored into the variable 'a' and an axes figure inside that figure with a handle value storing in b. This makes referenceing each individual object much more simple than finding parent/daughter objects.

Now that we have a good idea of how handles can be used lets introduce some of the most usefull commands that can be used with these handle values.

The "get" command: used to grab all object properties from a handle, or a specific property value.

The "set" command: used to set a property value of a handle.

The "findobj" command: used to find all handles that have a property set to a specific value.

The "uicontrol" command: used to create I/O objects such as radio buttons, pushbuttons, textboxes, etc.

Use the "help" command to learn more about these functions. This is all for now. Next time, I will discuss callback functions and how to create an event based GUI.